Use File - Close All to close all open editing windows.
To help you get started, we will provide a project that contains some images you can use. Follow these steps to import it into your workspace:
-
From the RAD menu, choose File - Import to start the wizard.
-
On the first wizard page, expand the General category and select Existing Projects into Workspace, then press Next.
-
On the next page, click the Select archive file button, then press the Browse button and navigate to {Lab Installation Directory/starters/lab05. If your computer has the standard lab setup:
c:\Users\username\webclass\starters\lab05Select lab05.zip and press Open followed by Finish.
You should see the Lab05EAR and Lab05Web projects in the Enterprise Explorer.
-
Expand the Lab05Web project's WebContent folder and note that it has an images subdirectory containing pictures for various menu items. The image file names should give you a pretty good idea of what the picture is.
As you have done in earlier labs, in the WebContent folder, create a Web Page named menu.html. Your job is to complete the HTML and styling to show the pizza parlor's menu.
Start by copying the header and footer elements from the last lab's blog HTML (you don't need the navigation element). We recommend that you use <section> elements instead of the last lab's <article> element.
The following three screenshots show what your end results should be. Note that these screenshot images are in the starters folder so you can see what the colors should look like.
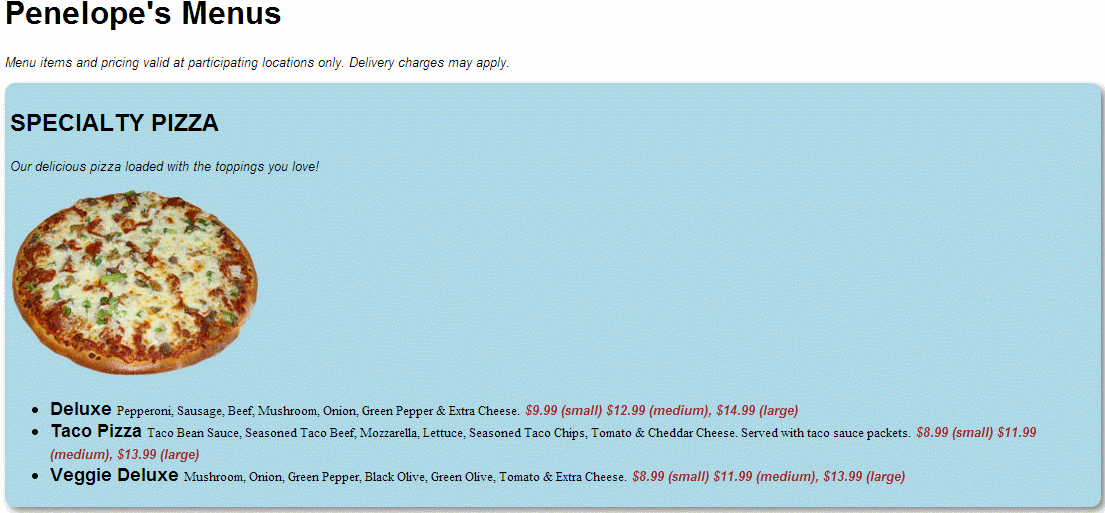
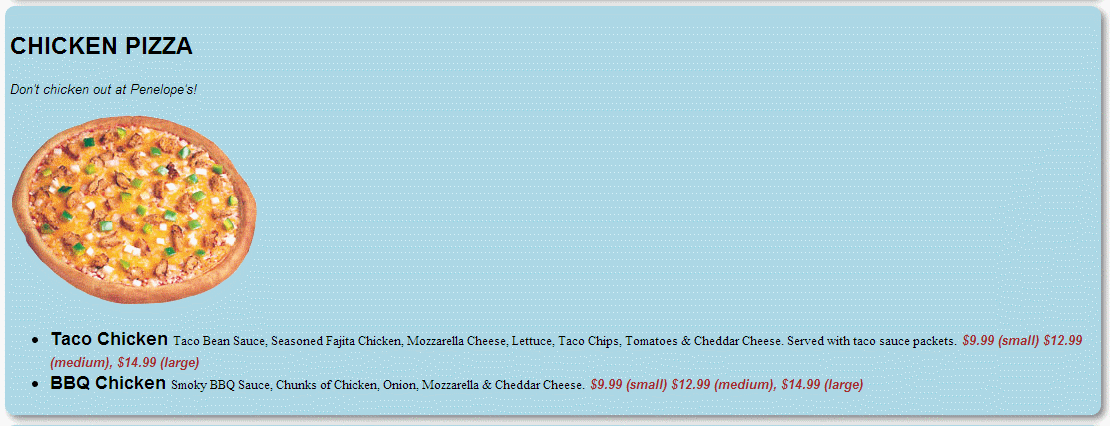
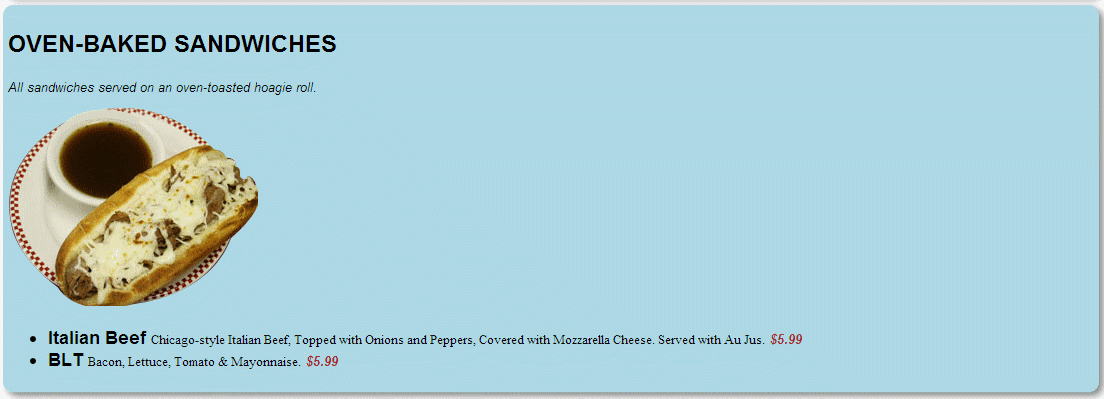
We recommend that you use an external stylesheet and try using as many different kinds of CSS selectors as you can so you get experience using them.
If you have time, note that there are several images in the project that represent other menu items. Add more sections to your page for those items, using verbiage as you choose.